Monday, April 26, 2010

Impressibilities

This is for my friend Kren who had asked my opinion of the Spellbinders Impressibilities. I was not impressed. And had heard others say what I was saying. They just didn't make a good impression. Well this week I saw the new ones especially the one with the sea shells and like I really need that one. Then StampTV had a video and now that I have high speed internet I was able to watch the video. I found out my main problem. PAPER!!! You need light weight paper. We're all trying to use the SU or the Georgia Pacific sold at Walmart. These are tooo heavy. So off to Joanns I went yesterday and bought a pack of the paper they sell and today gave it a try. This is what I found. This is your sandwich starting at the bottom. A plate- B plate- rubber mat-Impressibilities-paper-B plate-card stock to shim. I used 4. Although I still am not sure of the embossed side. The folders do a better job in my opinion.


But the debossed side is quite nice. This side could give you a very lacey effect. I really like the white outlines.


So am I going to order the sea shell Impressibilities. You know I am.

A couple of sample cards

We will be doing these 2 techniques at my demo. I worked very hard today researching and sampling. The ink is not where you think it is.


Alcohol ink can be used on more than cards

I have been wanting to do this ever since I saw someones heat gun on another blog and since I have the day off I am playing. So here are my heat gun (plastic) and this white box (metal) that you can find at Joanns or Micheals.


And here they are finished.


Here is what I used. You could use Alcohol Blending Solution or you can use 91% Rubbing Alcohol. There are different strengths of alcohol when you go looking for it. This is the recommended percentage to use. Several colors of Alcohol ink and cotton balls.


Soak your cotton with the alcohol and add several drops of each color of your ink.


Now start pouncing and keep pouncing adding more ink as needed to get the look you want.


Now one last step. Spray your finished projects. with Fixatif by Krylon. They will take a few minutes to dry.


I hope you take the time to alter something. The box can now have bling or ribbon added to it. Maybe some flowers on the top. You will have a pretty and very quick and easy gift for someone when you are done. These boxes come in all shapes and sizes. The possibilities are endless.

Sunday, April 25, 2010

I'm doing a demo on Alcohol ink

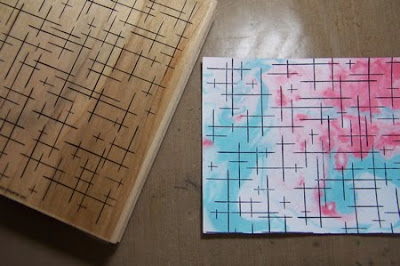
And what I'm finding out as I get prepared for it is there is more information than I can fit into one demo. So I thought I would put bits and pieces here for you and finish off at the demo in May. The first technique I am going to share with you will remind of the shaving cream technique only there is no shaving cream. LOL Start out with a container that you can put water in. You need about 1" of water in it. Now drop a couple of drops of your first color.
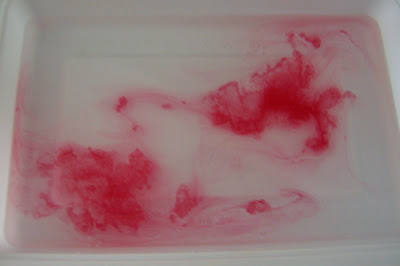


Now add your second color and swirl the water around if you want.
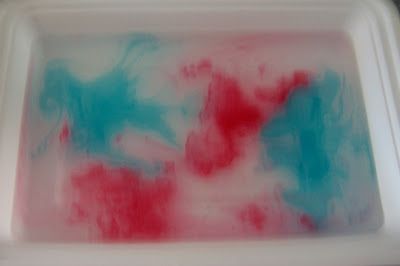


Lay your card stock on top of your inky water and push it down. Lift out the paper and let dry. Here is a sample using regular card stock.
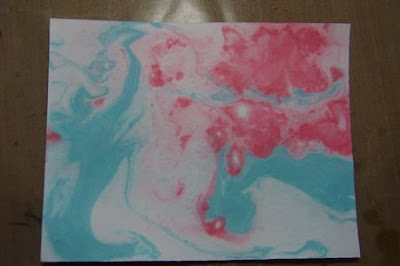


And here are 2 more samples. The one on the left is glossy card stock and the other one is regular card stock. The ink soaks into the regular card stock and sits on top of the glossy. The glossy will take a little longer to dry.
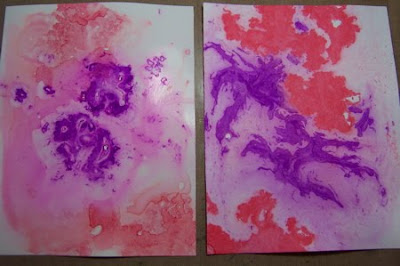


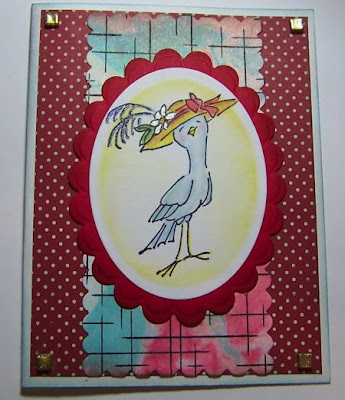
My first sample was stamped with Archival Black ink and a background stamp from Su. I then cut it out with a Nestabilities rectangle and sprayed it with gold Glimmer Mist for some added shine before assembling my card.


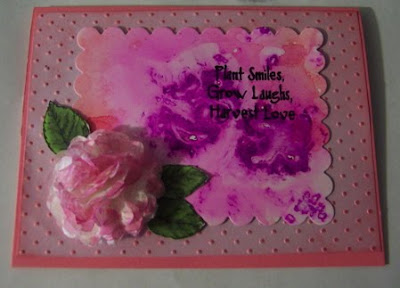
And here is the Glossy piece. I stamped the words right onto the background and added a tissue paper flower I sprayed with Glimmer Mist.


This next technique lets you use the alcohol inks to color your image. You'll need a pallet for your inks and either Alcohol Blending Solution or Alcohol. You will want to stamp your image with the same ink you would use for your Copic markers. Stazon will not work for this.
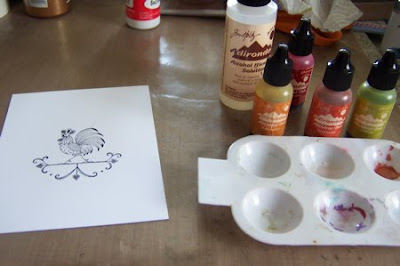


Take your pallet and add a couple of drops of the Blending Solution/Alcohol. Now add a couple of drops of your first color.
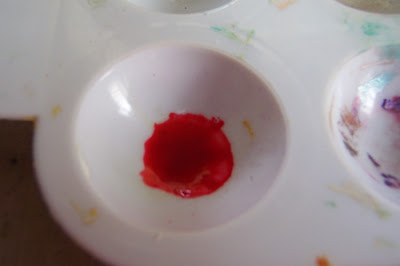


Using a brush color all the parts of the image that will use that color. When done clean out the section of your pallet and do the same procedure with the next color. Continue this until your whole image is colored in.
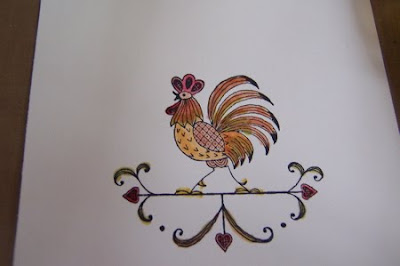


Now you can hilight and shade with colored pencils. And here's my card. I cut out the image with a circle Nestabilities and leaving the image in the die I added color to the background with a sponge applicator. This leaves you a nice clean edge all the way around.
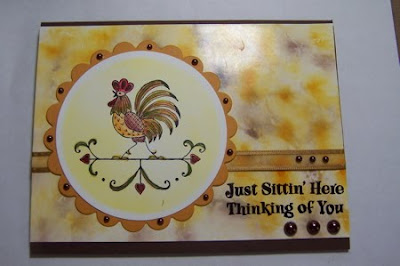


The background is another Alcohol ink technique I will talk about later. I hope you enjoyed this and give both of these a try. I will be back with a few more ideas real soon.

Thursday, April 15, 2010

Oh no I have to go back to work.

Yesterday my parents were here all day and we had supper for my last night of vacation. After they went home I worked on some samples for I demo I am doing in May on Alcohol ink. I made a really good discovery. You may already know this but I have had this ink pad for years and have never used it. Last night after throwing sample after sample away after I stamped with Stazon. I just don't have a good thing to say about black Stazon. Anyways in one of the articles I was reading talked about Ranger Archival jet black ink. I say to myself "you have one of those" so I hunted it out, stamped with it and OMG. It will now own a spot on my desk top. Let me show you. Here are 2 samples I made. They are stamped with the same stamp from I Brake for Stamps. Which one do you think is better. Bye Bye Stazon.


Here are a few of the backgrounds I made. They are all different techniques.


There are also a few other tools if you don't have you might like to think about purchasing. The first thing is the Craft Mat. You can do anything on it. Glue , paint, squirt ink all over it for techniques, whatever and the best part is you can wipe it right off and you are not using all that paper under your projects. You can heat on it and I just love it. The other things there are the Tim Holtz applicators. You can get the sponge pieces and they are awesome for distressing. You seem to have more control with them than you do with a regular art sponge. Or you can use a piece of felt to do the alcohol ink techniques. I will be showing these at my demo and letting you try for yourself. I know you will want to add them to your gadget collection but they will be a gadget you go to over and over.


Well as much as I hate the idea I must go and get dressed for work. Atleast I am rested and ready to deal with all those customers who are always right. Whoever came up with that concept? :O)

Tuesday, April 13, 2010

I have not cooked a meal since last Thursday

It has been wonderful. Tomorrow is my last day of vacation and I won't be cooking this day either. I have been taken out and had meals cooked for me. Of course Thursday I will have to come back to reality, return to my real life both at work and at home. Until then though I am still on vacation. I managed to finish 2 cards this evening. This first one I have been playing with for days. I had made the background. That was easy enough but adding an image was a little tricky. Just couldn't get the look I had dreamed of. I'm using my Rose set from Flourishes again. It is one of my favorites. I don't think this stamp set could look bad on any card front.

I first embossed the background stamp with clear embossing powder and then sponged Mustard and Victorian Velvet Distressed ink over it. I used my Prisma pencils and Gamsol to color the rose and leaves. The next card uses another rose from the set. My first time for using it. I colored it the same way and cut it out. The back ground is watercolor paper sprayed with water and then with several Glimmer Mists. I added pearls to both.

Sunday, April 11, 2010

Days 2 & 3

I have been having a real relaxing time. Spent yesterday with my daughter shopping and today with my husband, daughter and her boyfriend. We went to the fair, ate some junk food, had an enjoyable ride through the country and then home where I started the task of removing all the dead plants and replacing them with what we bought yesterday. Under the rubble of my dead banana trees I found 3 plants coming. Very happy about this. The front is looking quite nice now and we will have to get started on the rest of the yard. Well I have been staying up late and doing some stamping but haven't quite finished anything yet to show you but my son the computer genius made this picture for us. He took a picture of my husband and one of a pig and fused them together. We laughed so hard. It is fabulous. So I will share that with you tonight and hopefully tomorrow I will finish a few of the cards I have been working on.

Friday, April 9, 2010

Vacation Day 1

Well it's hard to believe the day is half over. I've done laundry, worked on April swaps that were not finished, addressed the rest of April Birthday cards, watched the video for the awesome card I will be demoing in July and now I'm getting ready to go out for Supper at the Smokehouse Grill. No work for me today. I'm on vacation. It's been great but it won't really feel like a vacation until about Sunday. Then it will sink in that it is half over and I'd better get moving. Tomorrow Robin are taking a mother/daughter day. We're going to Mt. Dora shopping and to Crispers for lunch. Here I come Stamping Station. Hope you have what I'm looking for. I was going to take a picture of one of my birthday cards from today but the cameras battery was dead so maybe I will have something to show you tomorrow. Until then I'm repeating to myself I'm on vacation!! Come On LOTTERY!!! Let's make this a real long vacation.

Thursday, April 8, 2010

Hello Blog

It seems like forever since I have been here. This horrid schedule I work has left me with very little time and my creativity has gone. But today is a wonderful day. It's my last day of work. I have decided to take a vacation. So starting tomorrow I will be sitting at my desk and getting reacquainted with my ink and stamps. I have so much I want to work on before I'm back to work. So until tomorrow here is a picture of my beautiful daughter Robin.