
Wednesday, February 8, 2012
Dogwood Blossoms
Ladies of SSSD recognize this background? It's a salted background. Hope you are enjoying the technique this month. I love this technique. You get such a soft looking background paper. The Dogwood is another new set from MFP a HC being introduced next week. I've cut these out and entwined them with this leafy flourish die cut.


Tuesday, February 7, 2012
TLC363 - Make your own stripes
That is the technique this week at Splitcoaststampers. You are to take strips of paper to make your background. The image is new from MFP a HC being introduced next week. I colored it with Copics and lightly sponged color around the inside of the circle die I used to cut it out. I recently purchased the jumbo daubers and so glad I finally decided to do it. I love them. They sponge much better than the yellow sponges I have always used.


Monday, February 6, 2012
It's Sneak peek time
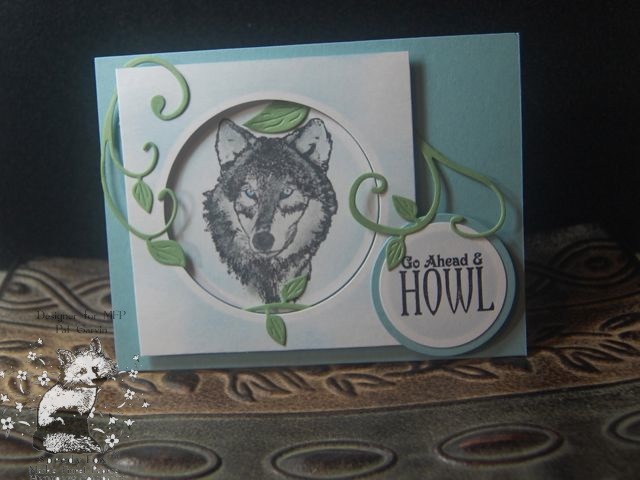
This set is wonderful. It is called North American Woods and is from MFP a HC. It will be available next week. I love woodsy images so this one has been easy to work with for me. He is so cool. I love his stare. All the images will make great male cards.

Saturday, February 4, 2012
Speedy Fox and Friends Challenge 93 -- Use a Spray
This week our Challenge was to use a "SPRAY". I have used Smooch Spritz and Gold webbing. I started by sponging Wild Honey, Mustard and Straw Distressed inks on my card stock. Then I sprayed it with the Smooch Spritz. That was nice. Had a real shine but wasn't doing it for me so out came the webbing. I then laid a stencil on the inside of the card and sprayed with the Smooch. I like how that turned out. Stamps, ribbon and Smooch available at Marks Finest Papers a Heinrich Company.


Hope you participate this week in the challenge. You could win a New Stamp set from MFP a HC.


Hope you participate this week in the challenge. You could win a New Stamp set from MFP a HC.
Wednesday, February 1, 2012
SSSD-Feb. Build a Sketch
This month we are using pieces 1-2-3-& 9. Here are some examples of what you can do.


Here's my card. I went through my stash of colored images and found these poppies. Cut them out with my scalloped die. Have fun with your pieces. Can't wait to see what you come up with.


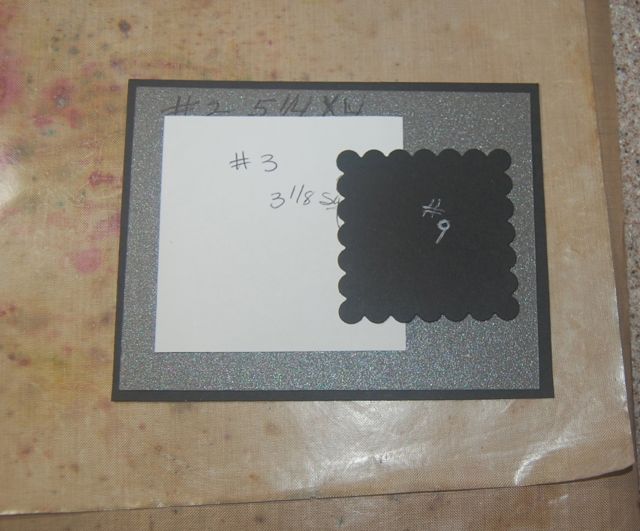


Here's my card. I went through my stash of colored images and found these poppies. Cut them out with my scalloped die. Have fun with your pieces. Can't wait to see what you come up with.

SSSD/February Try a Different Card
This month we are making an explosion box. I have never done this one. It was very easy and quick to do. Fill it with lots of sparkle for whoever opens it. Here we go. The very first most important thing is this: Because the lid is 3D you will need a padded envelope to mail to your partner. The card itself can be mailed flat.

First step is to take a 7 1/2 x 7 1/2 square of double sided designer paper or card stock.

score at 2 1/2" and 5". black lines


Now you are going to score each corner square right down the middle. Blue line


These two scraps are for your center sentiment.


Box part of the card is finished. On to the lid. You will need a 4 1/4 " piece of double sided paper or card stock. Score at 7/8" on each side.

See where I have cut. This forms you gluing tabs.

Look closely at the white template . Do you see where I trimmed these tabs down just a tiny wee bit at the edge.

Here is my lid all 4 tabs have been trimmed and I have attached my scor -tape. You can use red line tape.

Remove the tape backing and putting the tape to the inside form your lid by bringing up your sides
towards the center..

Now decorate your lid. Here is mine with the box. The lid holds the box part together.

 Ok now remember a padded envelope is needed to hold your lid. The box/card can go flat.
Your partner can fold it and put the 2 pieces together.

First step is to take a 7 1/2 x 7 1/2 square of double sided designer paper or card stock.

score at 2 1/2" and 5". black lines

turn a quarter round and score again at 2 1/2" and 5". Red lines

Now you are going to score each corner square right down the middle. Blue line

Look at mine for folding. Corners are mountain folds. The other lines are valley folds. You will fold it towards the center forming a box. No securing is needed.

These two scraps are for your center sentiment.


Box part of the card is finished. On to the lid. You will need a 4 1/4 " piece of double sided paper or card stock. Score at 7/8" on each side.

See where I have cut. This forms you gluing tabs.

Look closely at the white template . Do you see where I trimmed these tabs down just a tiny wee bit at the edge.

Here is my lid all 4 tabs have been trimmed and I have attached my scor -tape. You can use red line tape.

Remove the tape backing and putting the tape to the inside form your lid by bringing up your sides
towards the center..

Now decorate your lid. Here is mine with the box. The lid holds the box part together.


Your partner can fold it and put the 2 pieces together.
SSSD-Feb. Technique/Salted Background
This month we will be working on a project that requires Kosher or coarse salt. You can also use regular table salt but will not have the same effect. But you may use it if that's what you have.
Here is what you will need:
Dye Reinkers, Glossy card stock, spray bottle with water and a water brush.

Spray your card stock with the bottle of water.

Need a few drops of several colors of Dye Reinkers. Can put these on your work surface, acrylic block or a pallet.

Take your water brush and swirl the ink around in no certain pattern.

Don't have reinkers. No worries. Here I smooshed several dye ink pads onto my glossy card stock.

Spray it with water.
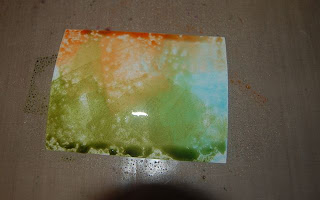

Spray with water lightly.

Now you can heat it with a heat gun or walk away and let it dry on its own.

Now take a paper towel and wipe the salt completely off. It will no longer be glossy.

Here are both of my samples after being cleaned off.

And here are my cards . You can stamp right on this background with no problems.

Here is what you will need:
Dye Reinkers, Glossy card stock, spray bottle with water and a water brush.

Spray your card stock with the bottle of water.

Need a few drops of several colors of Dye Reinkers. Can put these on your work surface, acrylic block or a pallet.

Take your water brush and swirl the ink around in no certain pattern.

Don't have reinkers. No worries. Here I smooshed several dye ink pads onto my glossy card stock.

Spray it with water.

Sprinkle salt over the whole piece of card stock.

Spray with water lightly.

Now you can heat it with a heat gun or walk away and let it dry on its own.

Now take a paper towel and wipe the salt completely off. It will no longer be glossy.

Here are both of my samples after being cleaned off.

And here are my cards . You can stamp right on this background with no problems.

Subscribe to:
Posts (Atom)